The Power of SED


I use pydio on a few of my servers for sharing files.  Recently, on one of them, I decided it would be good to move the document root for the site.  Everything seemed really great, until I started getting reports of files that were shared earlier were no longer working.

Seems that when you share a file, pydio creates a tiny php file that gets stored in /your_doc_root/data/public

Inside that php file, onf of the things that you find is a line that says,

require_once(“/your_doc_root/data/publicLet.inc.php”);

So, when I changed my doc root from /usr/local/www/apache24/data/admins/ to /usr/local/www/apache24/data/, things stopped working.

If you only had one or two files shared, you could just go in and edit each of them.  I had hundreds to deal with.  Luckily for me, my google-foo was excellent today and I came across an excellent post about using sed to replace text within files.

Long story short, for me to get rid of the offending “admins” in all of the shared files, I just needed one tiny sed command.

sed -i '' -- 's/admins\///g' *.php

You would want to cd to the data/public folder, then issue that command.  Doing so will look in all files in that directory ending in .php and replace anything that is “admins/” with nothing.

Happy day!  Thank you internet!

Advertisement

Baikal Server – Your very own CardDAV / CalDAV server


Hi all!  Sorry for the lack in new posts.  I’ve had a busy past several months.  We sold and bought houses, moved, did multiple projects at the new house and had an accident at work that left me with 6 broken ribs, 4 fractured vertebrae and a concussion to top it all off.

All that said, I have been tinkering a little on some computer geekery.

This really has very little to do with FreeNAS, but I ran across a great little project for running your own CalDAV / CardDAV server.  The project is called Baikal and can be found here http://baikal-server.com/ .   I’ve been looking for something like this to share contacts with my wife for a long time.  I first tried OwnCloud, but the way it integrates with Apple’s AddressBook is clunky, with many card imports getting missed and even a few crashes of the AddressBook App.  I’ve had Baikal up and running for a few days now, and so far, it has been working great.  What I haven’t exactly figured out yet, maybe because it isn’t an option yet, is how to share contacts between users.  So for the time being, both my wife and I are using the same login.

So, now for the FreeNAS part of this.  I am running the Baikal server on my FreeNAS box in a jail.   Install was really easy, especially because I already had a jail up and running with a webserver installed.

Part I

Get the software

1. Open a terminal either through the GUI or ssh and connect to the server.

2. Switch user to root.

 su
 enter root password

3. Jexec into your jail

jls

JID   IP Address    Hostname    Path
1     192.168.0.44  Services2   /mnt/Files/jails/Services

You’ll want to replace 1 in the next line with the corresponding JID for the jail you want from the above output.

jexec 1 csh

4. Update the ports tree.

portsnap fetch
portsnap update

5. Install the package for Baikal

pkg install baikal

6. Change the ownership on the baikal directory…this will depend a little on your setup, apache defaults to using www. Then move it somewhere a little more useful.

chown -R www:www /usr/local/www/baikal
mv /usr/local/www/baikal /usr/local/www/apache24/data/.

7. Setup the webserver for baikal.  I use apache, so that’s what I’ll show you.  Edit the httpd.conf file and add the following towards the bottom.  ServerName can be either an IP or a URL

vi /usr/local/etc/apache24/httpd.conf

<VirtualHost *:80>

DocumentRoot /usr/local/www/apache24/data/baikal/html

ServerName xxx.xxxxxxxxx.xxx

<Directory “/usr/local/www/apache24/data/baikal/html”>

Options None

Options +FollowSymlinks

AllowOverride All

</Directory>

</VirtualHost>

 8. Restart apache and see if it works.

service apache24 restart

9. Test to see if things are running right.  Go to the URL you used in the above apache config.  You should see the following if everything is working.

Screen Shot 2014-12-10 at 9.01.27 PM

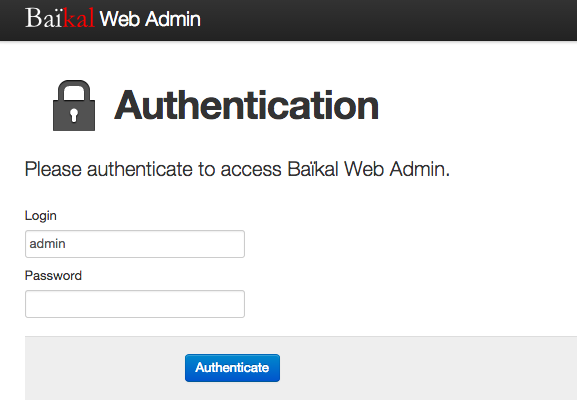
10. Log into the web setup utility for Baikal.  Add a /admin after the URL from above.  Now you should be greeted witha nice little setup page.  After setup is done, you end up here:

Screen Shot 2014-12-10 at 9.03.29 PM

Log in with the admin credentials you just created, then create at least one user.

11. Now, the cool part is linking your address book to it.  The tricky thing about that is getting the URL right.  For AddressBook, it is:  http://server.ip.address/card.php/principals/username/

There is a really good description of various  setups for clients over at the GitHub page for the project. https://github.com/netgusto/Baikal/blob/master/INSTALL.md

Some closing notes, there are multiple ways to setup the webserver to make this go.  I’d recommend setting it up with ssl enabled.  That is a more complicated process and I haven’t the time nor desire to outline it here. Also, it seems that Baikal really doesn’t like being setup in a way where it is not the docroot.  So for instance, it is happy to be at http://somewebsite.com , but it will break when connecting your addressbook to it if it is located at http://somewebsite.com/cards.  Maybe it just doesn’t like being aliased, not sure exactly, but it sure wasn’t happy with me for a while.

Hope you all enjoy.

Enable Multi-Factor Authentication for OpenVPN


Google Authenticator and OpenVPN

Google Authenticator and OpenVPN

In my previous post, we went over how to get Google Authenticator installed on FreeNAS.  Then we setup SSH to use it.  In this guide, we’ll get Multi-Factor Authentication working for OpenVPN.  This guide will be specific to FreeNAS, but should be applicable to FreeBSD as well.

Part I

Get Google Authenticator installed and setup for users

Go see my previous guide on getting Google Authenticator installed.

Part II

Configure OpenVPN to use both certificates and an OTP (one time password) provided by Google Authenticator.

1. Open a terminal either through the GUI or ssh.

2. Switch user to root.

 su
 enter root password

3. Mount the file system and make it writeable

 mount -uw /

4. First we need to create an entry for openvpn under /etc/pam.d This will tell OpenVPN that authentication with the pam_google_authenticator.so module is required.  Also need to remember to copy this file to /conf/base/etc/pam.d so that our change will survive a reboot.

touch /etc/pam.d/openvpn

printf "auth required /usr/local/lib/pam_google_authenticator.so" >> /etc/pam.d/openvpn

cp /etc/pam.d/openvpn /conf/base/etc/pam.d/openvpn

5. Check to make sure the permissions are correct on the pam_google_authenticator.so module.  sshd doesn’t seem to care, but OpenVPN does seem to care.  Side note, there are several guides written for Linux that say you have to modify the MakeFile with LDFLAGS=”-lpam” when building the pam_google_authenticator.so module.  That is NOT the case in FreeNAS / FreeBSD as the port takes care of that.

chmod 555 /usr/local/lib/pam_google_authenticator.so

6. Now we need to add a few settings to our OpenVPN server config.  If you followed my guide on setting up OpenVPN on FreeNAS, your server config is on your data drive.  Change the part after the “>>” to match your setup.

printf "\n#Enable Multi-Factor Authentication\n" >> /mnt/Files/openvpn/openvpn.conf

printf "plugin /usr/local/lib/openvpn/plugins/openvpn-plugin-auth-pam.so openvpn\n\n" >> /mnt/Files/openvpn/openvpn.conf

printf "#Prevent re-authorization every 3600 seconds\n" >> /mnt/Files/openvpn/openvpn.conf

printf "reneg-sec 0\n\n" >> /mnt/Files/openvpn/openvpn.conf

7. Now, on your client computers, you need to add the following to your openvpn-client config.  You can just add it at the bottom.

#Add this to the client config to enable Multi-Factor Authentication
auth-user-pass

#Prevent the password file from being cached
auth-nocache

8. Now restart openvpn on your FreeNAS box.

service openvpn restart

Your output should look like this:

Stopping openvpn.
Waiting for PIDS: 494.
Starting openvpn.
AUTH-PAM: BACKGROUND: INIT service='openvpn'
add net 10.8.0.0: gateway 10.8.0.2

9. Make the filesystem read only again.

mount -ur /

10. Fire up your VPN connection on a client computer and you should get a field that asks for a username and password in order to connect.

Tunnelblick


You will put in your user name for one of the accounts you set up using the google-authenticator command on your FreeNAS server.  The password will just be the 6 digit OTP you get from the Google Authenticator App on your smart phone.  Don’t bother saving it in the keychain.  If everything goes right, you will connect and then see this in your terminal session:

AUTH-PAM: BACKGROUND: received command code: 0
AUTH-PAM: BACKGROUND: USER: joe
AUTH-PAM: BACKGROUND: my_conv[0] query='Verification code: ' style=1

Part III

Questions and such…

We’ve done it.  We now have multi-factor authentication setup for our VPN.  I’m left wondering though.  Many of the guides I looked at related to this subject said that /etc/pam.d/openvpn needed a lot more in it that what I have used.  For instance, one guide over at askubuntu.com says to use this:

account [success=2 new_authtok_reqd=done default=ignore] pam_unix.so
account [success=1 new_authtok_reqd=done default=ignore] pam_winbind.so
account requisite pam_deny.so
account required pam_permit.so
auth required pam_google_authenticator.so

Is all of that account stuff really needed?  My hunch is that it is not.  If you have any insight, please share it in the comments section.